Intro
TimeZest is a communication service. This page guides you through the process of setting up an integration with TimeZest. Pia has partnered with TimeZest to make the process of scheduling calls with Clients more efficient. To find out more about TimeZest, checkout their website.
You will need to set up a Custom Integration in the New Integration Experience, as part of this you will require a TimeZest account.
Scenarios
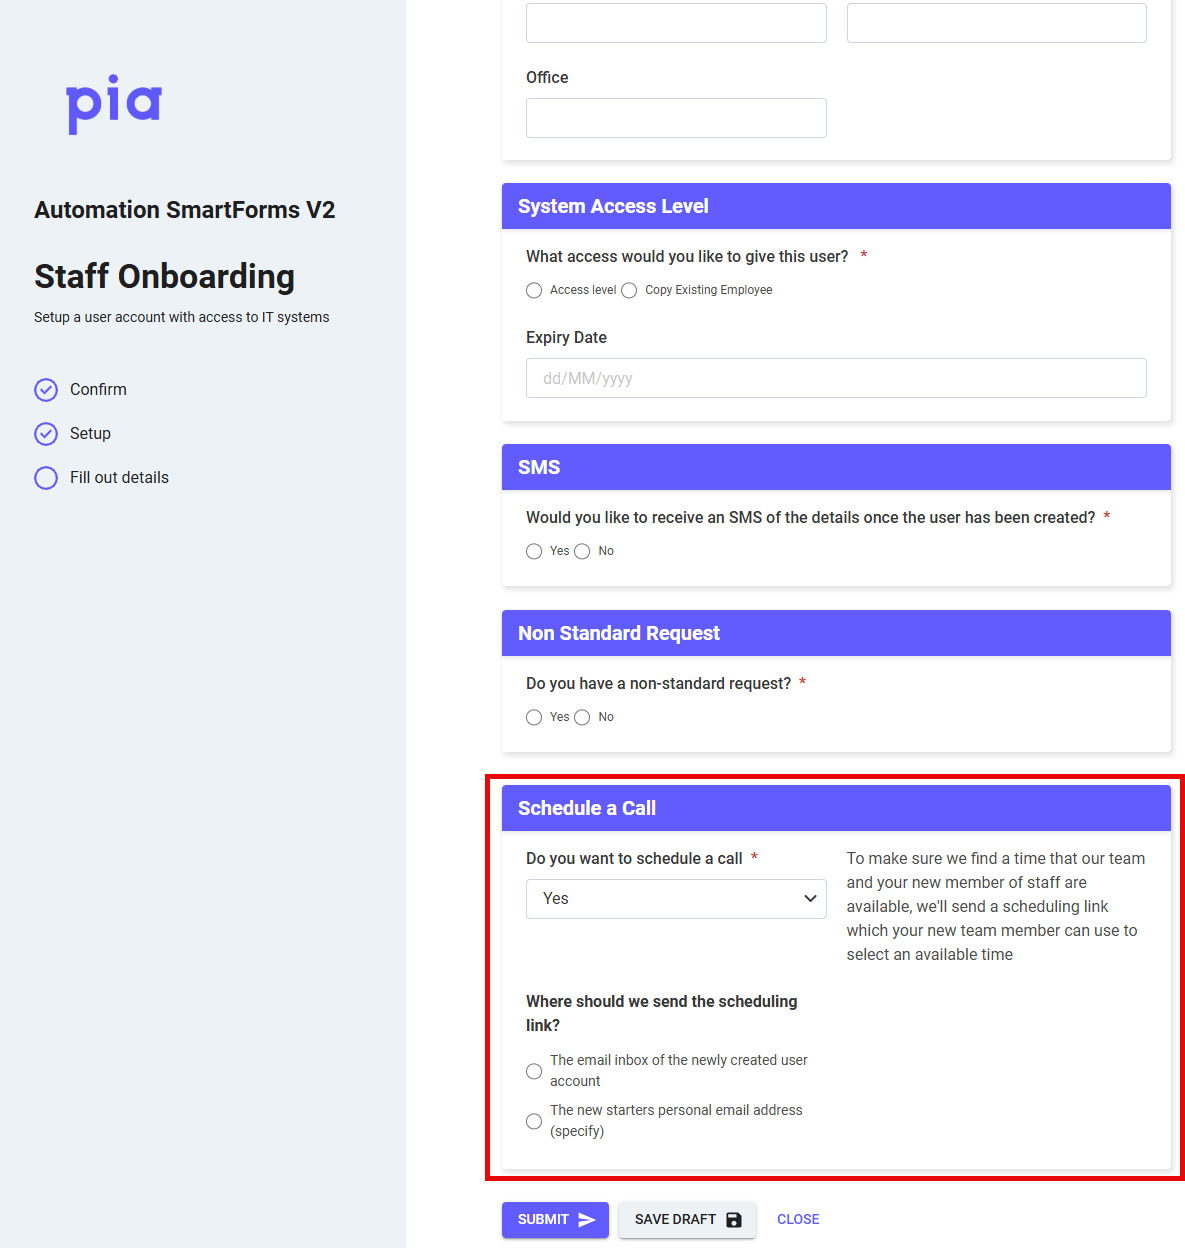
Scenario 1: Day 1 Setup for Staff Onboarding
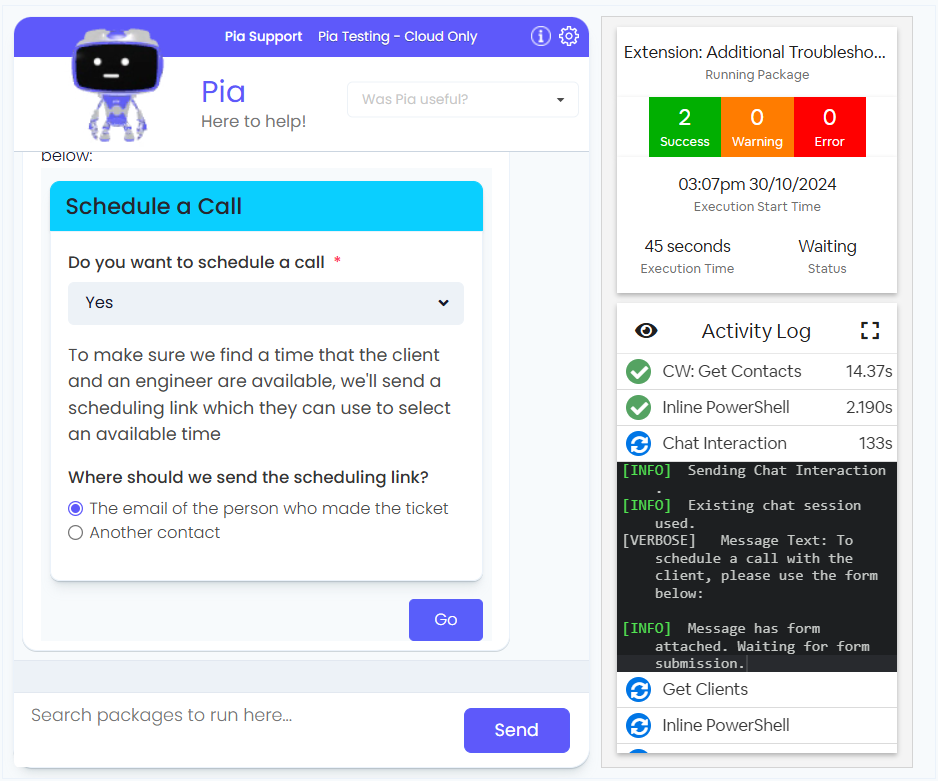
Example SmartForms request workflow
- Client submits a SmartForm and opts to Schedule a Call (specifying which email the scheduling link should be sent to).
- Client receives the TimeZest scheduling link to the nominated email address.
- Client selects call time slot via TimeZest.
Example Email request workflow
- Client submits a Staff Onboarding request via email, the Engineer assigned to the ticket will complete the ticket tasks and will opt to Schedule a Call with the new staff member (specifying which email the scheduling link should be sent to).
- Client receives the TimeZest scheduling link to the nominated email address.
- Client selects call time slot via TimeZest.

Scenario 2: Customer Requests a Sales Quote
When the MSP has configured Pia AI AutoStart for this package, it will automatically send a schedule link when Pia classifies the ticket category as Service Request|Sales|Quote. Pia will send a TimeZest schedule link to organize a call with a resource.
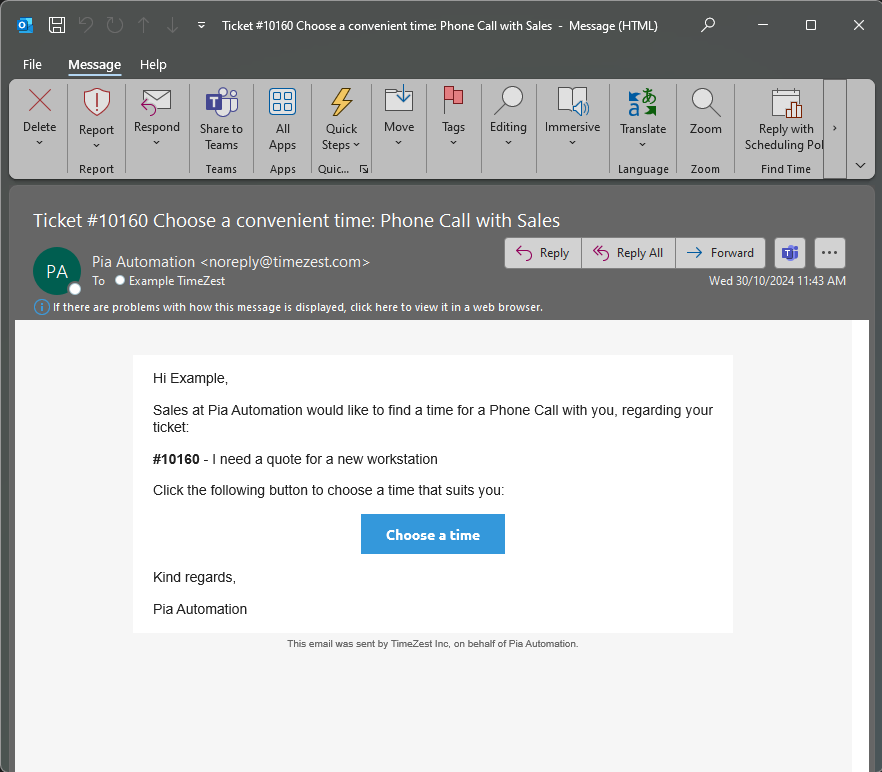
Example Sales Quote workflow
A Ticket is generated in the PSA.
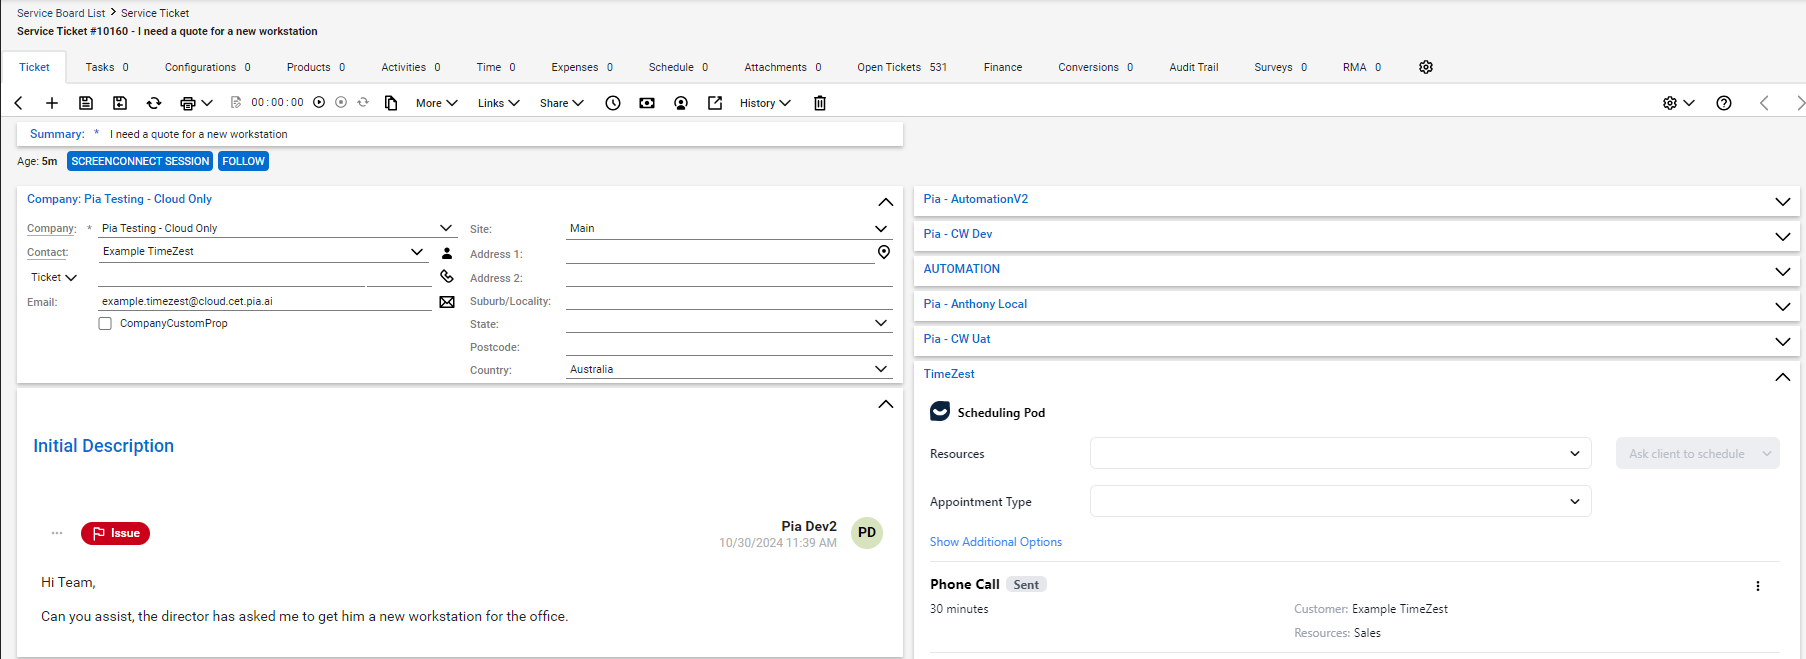
Pia categorizes the ticket and starts the automation.
TimeZest emails a scheduling link to the ticket contact.
Scenario 3: Schedule an appointment via TimeZest for Printer Troubleshooting
Example scenario: Printer Troubleshooting package
If the printer troubleshooting automation was unable to resolve the issues with the printer, the Engineer is presented an option to organize an appointment with the end-user (via TimeZest).
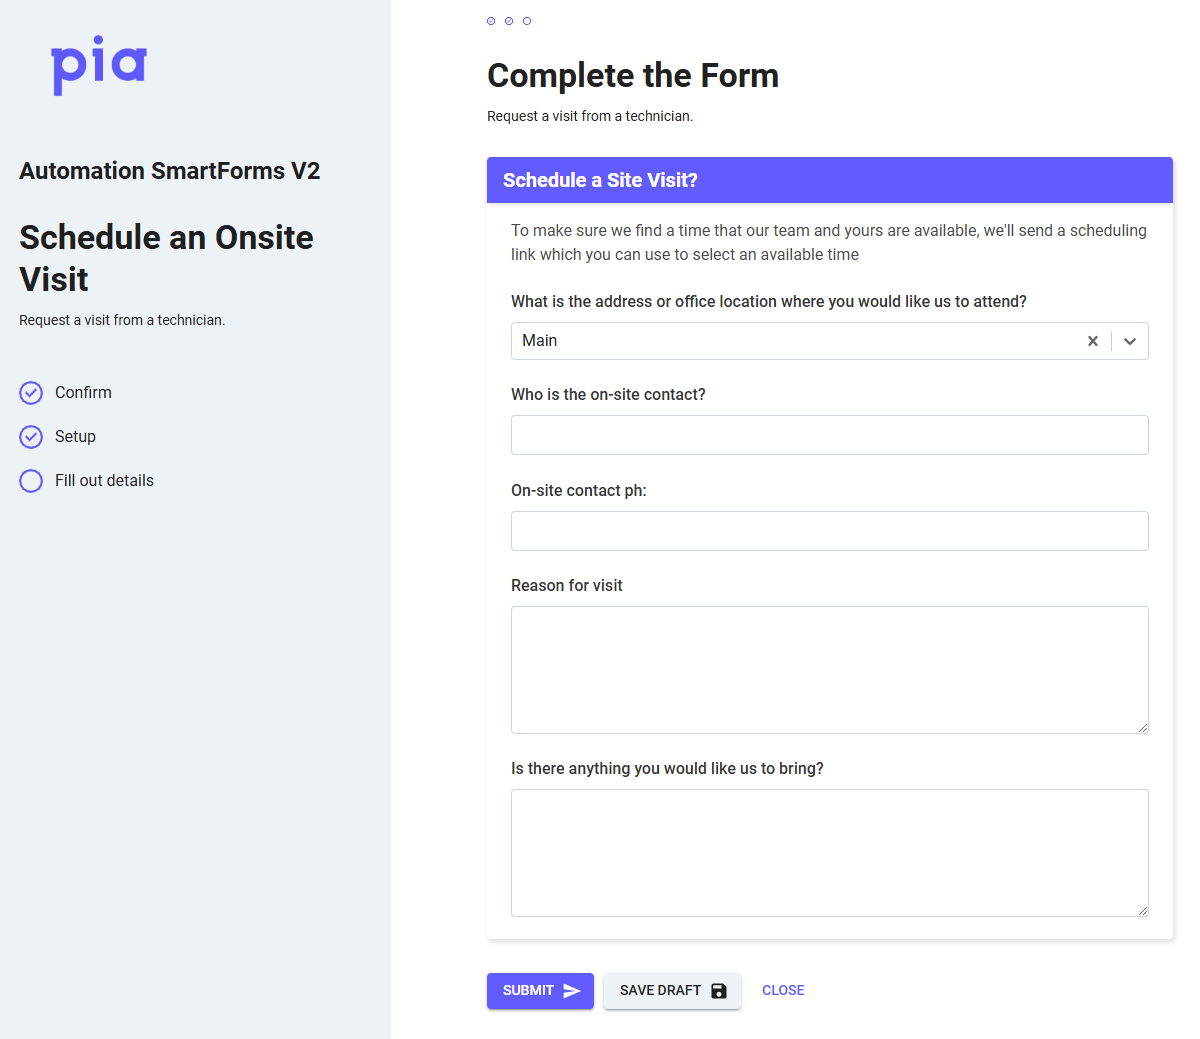
Scenario 4: Schedule an Onsite Visit via SmartForms Portal
Example workflow:
- Client submits Schedule an Onsite Visit SmartForm and opts to have an onsite visit.
- Pia will send a TimeZest Scheduling Link to the Client's email.
- The client will click the scheduling link and select a date from the TimeZest calendar.
Prerequisites
- Contacted your PSM to gain access to the TimeZest Integrations (or via Partner Support),
- Configured your TimeZest Appointment Types, and
- Generated your TimeZest API Key.
🔗 Refer to the following links for further advice on TimeZest configuration:
Integration Setup
The Pia provided TimeZest packages have all been preconfigured based on the prefix and postfix used in this article as part of setting up the integration configuration. If you modify those values, you will need to update the packages to use the TimeZest API URL and API Key.
- Follow Step 1 as per Add Custom Integration.
Entertimezestas the Integration Variable Prefix.-c0496ba3a1576b46af9023feca56b4ad.png)
- Follow Step 2 as per Configure your Integration.
Enter1as the Postfix.
Enter your TimeZest API Key. You can generate an API Key in TimeZest.-95199cda0c85854ecdf5fd003146c679.png)
Configuring the TimeZest Packages
When configuring TimeZest Packages, the appointment details and assignee must be set.
Follow the process below:
- Navigate to the Pia Portal > Configuration > Clients > Select Client Name.
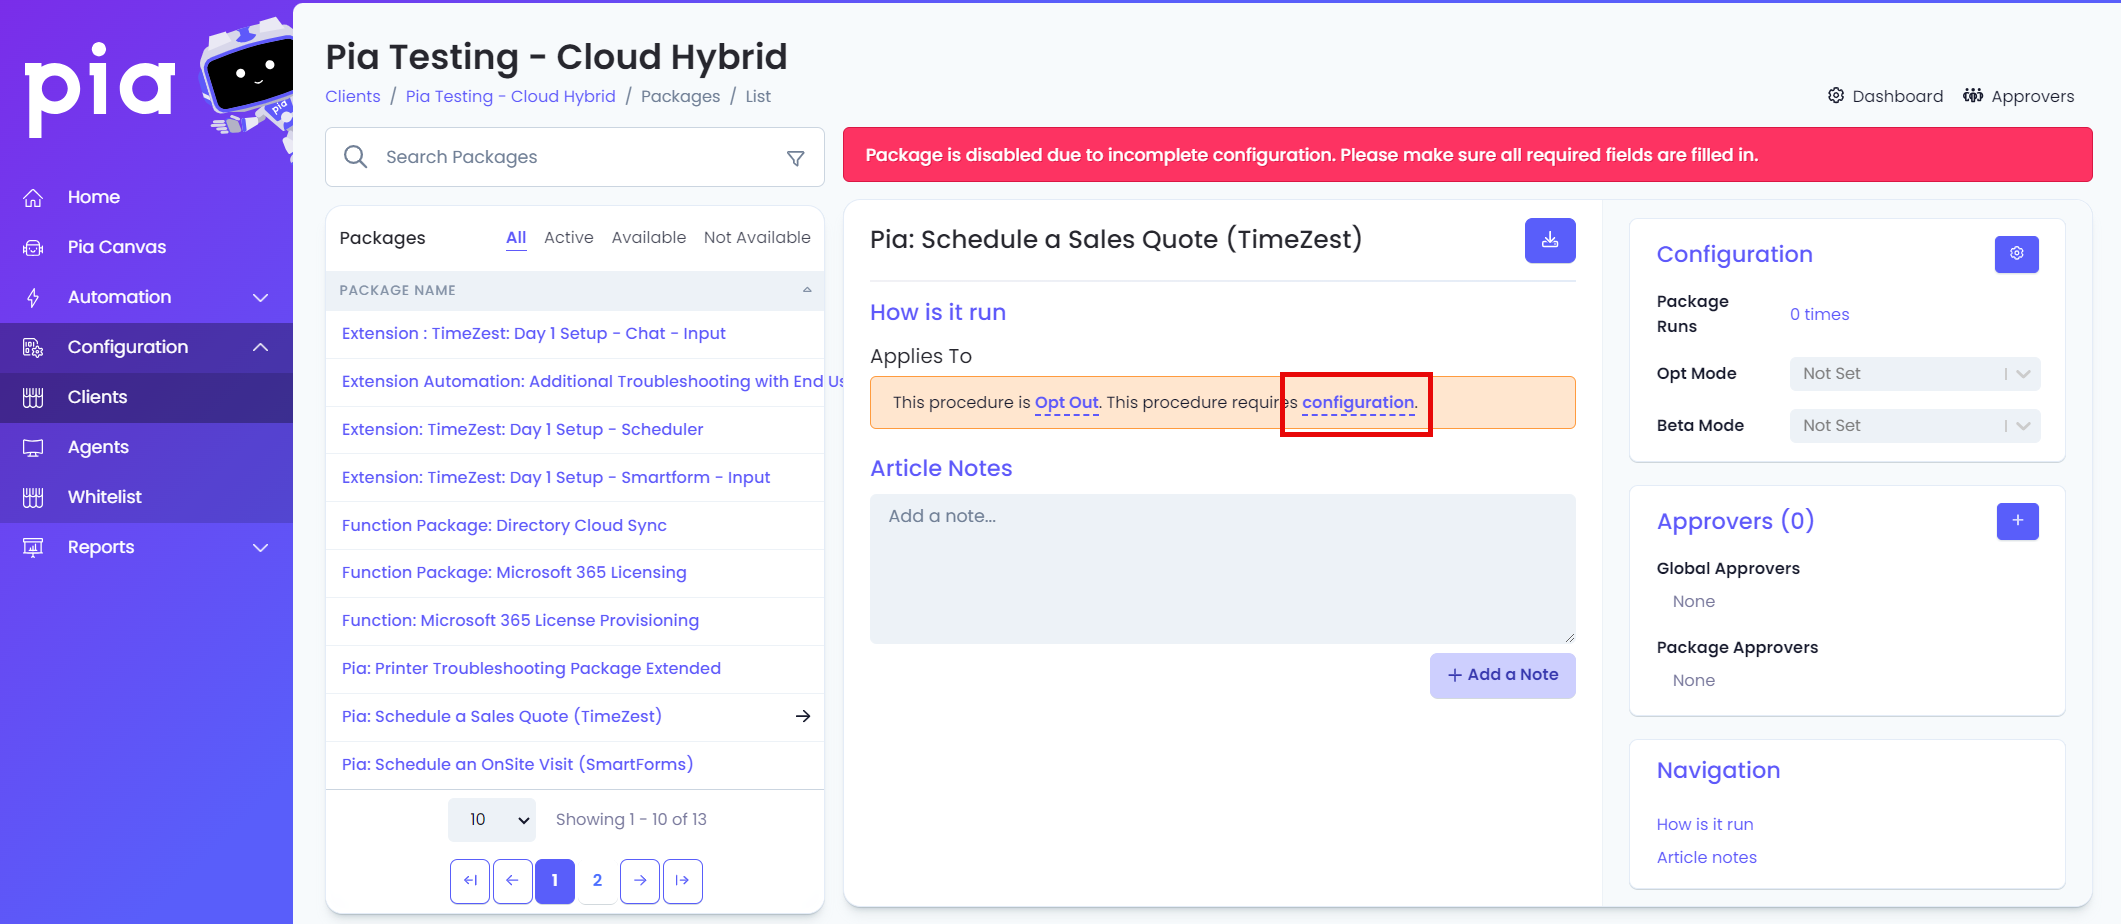
- Type 'TimeZest' into Search Packages, select the Package Name from the list.
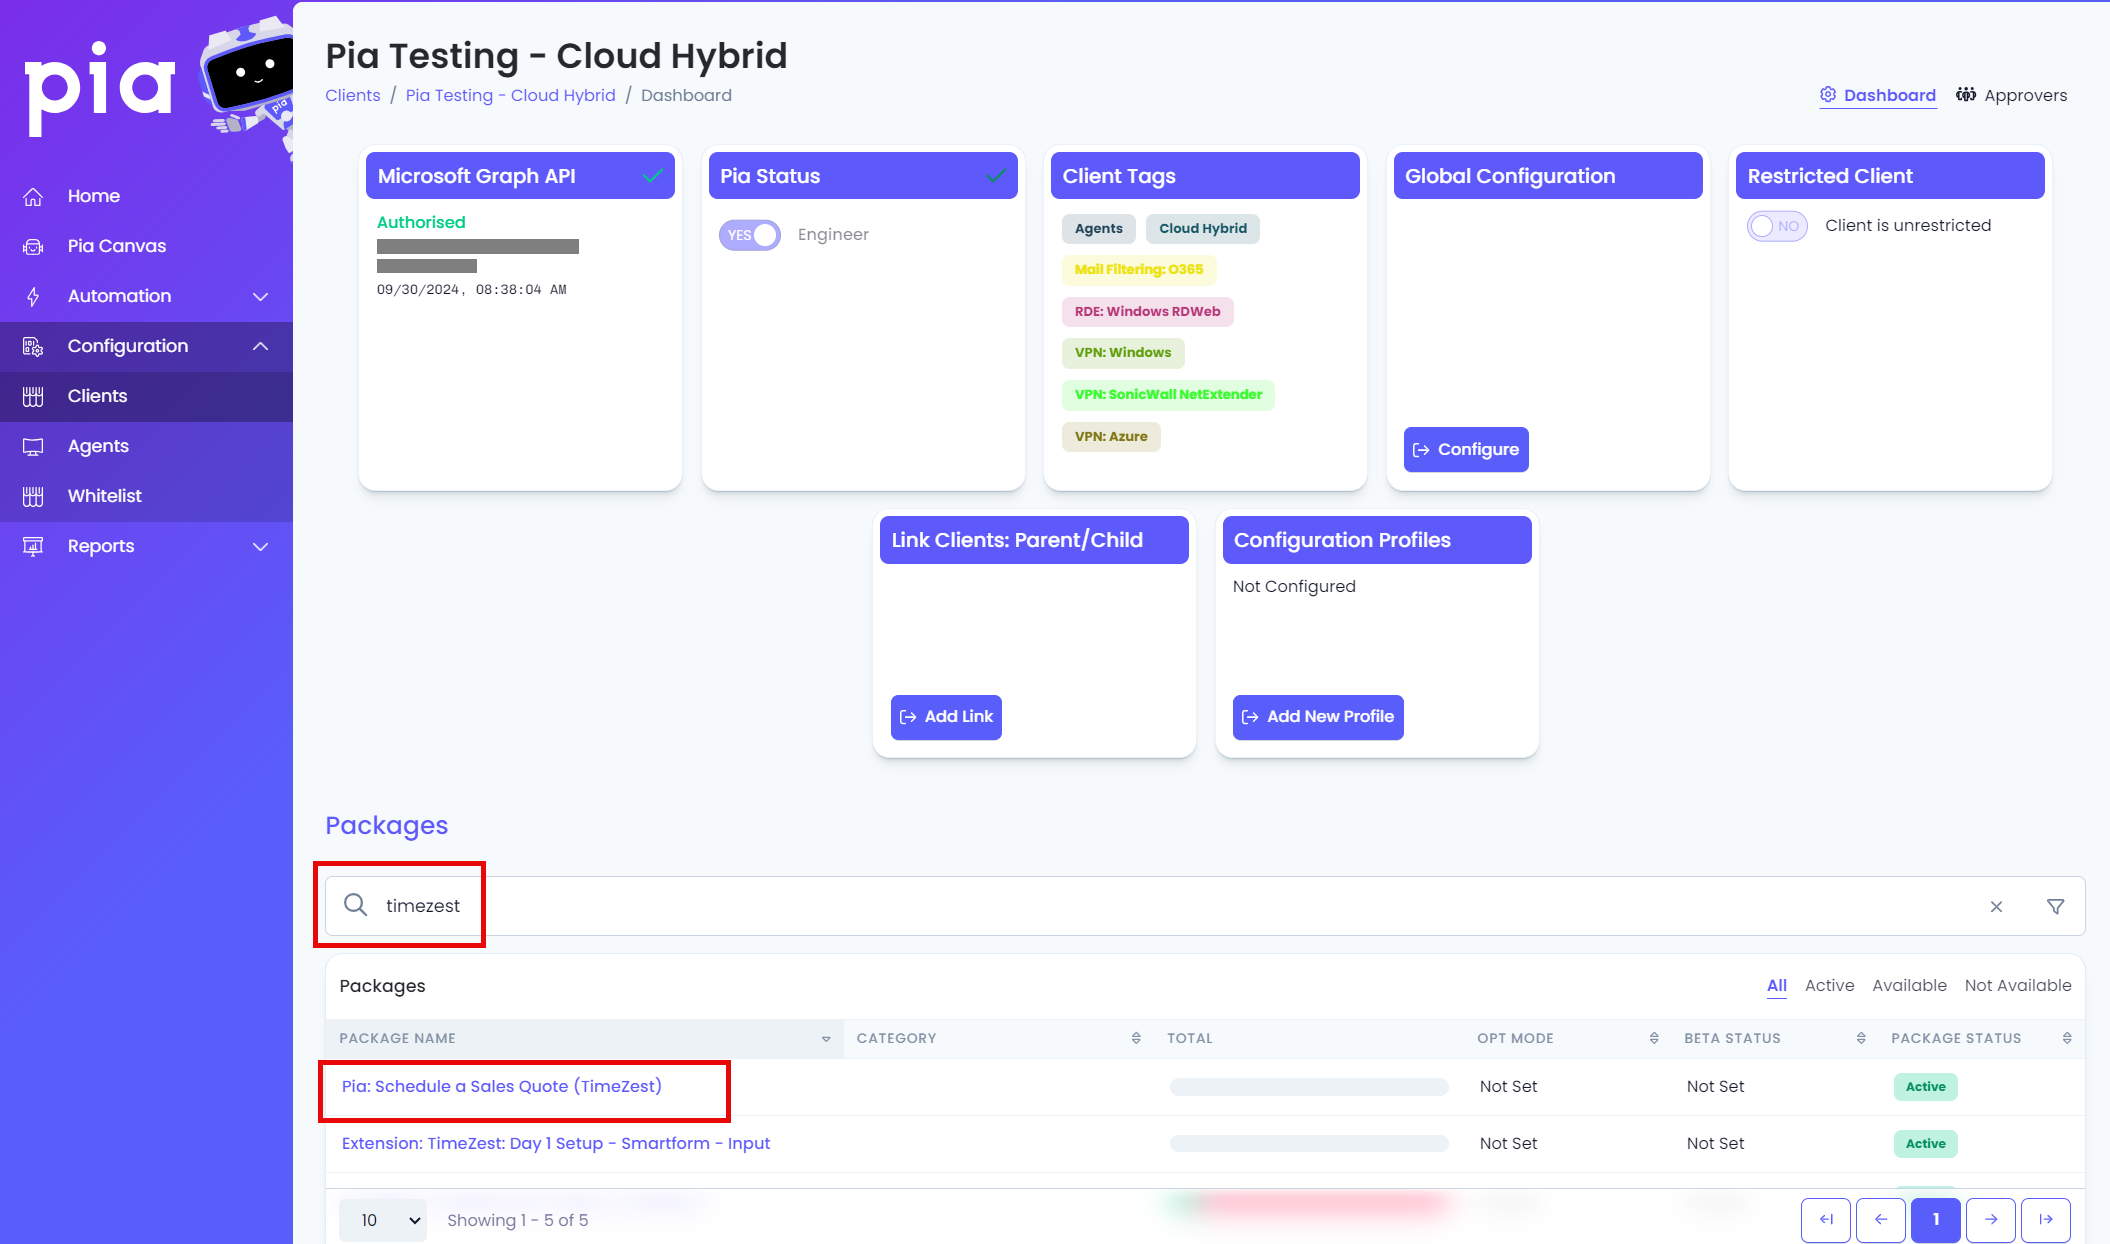
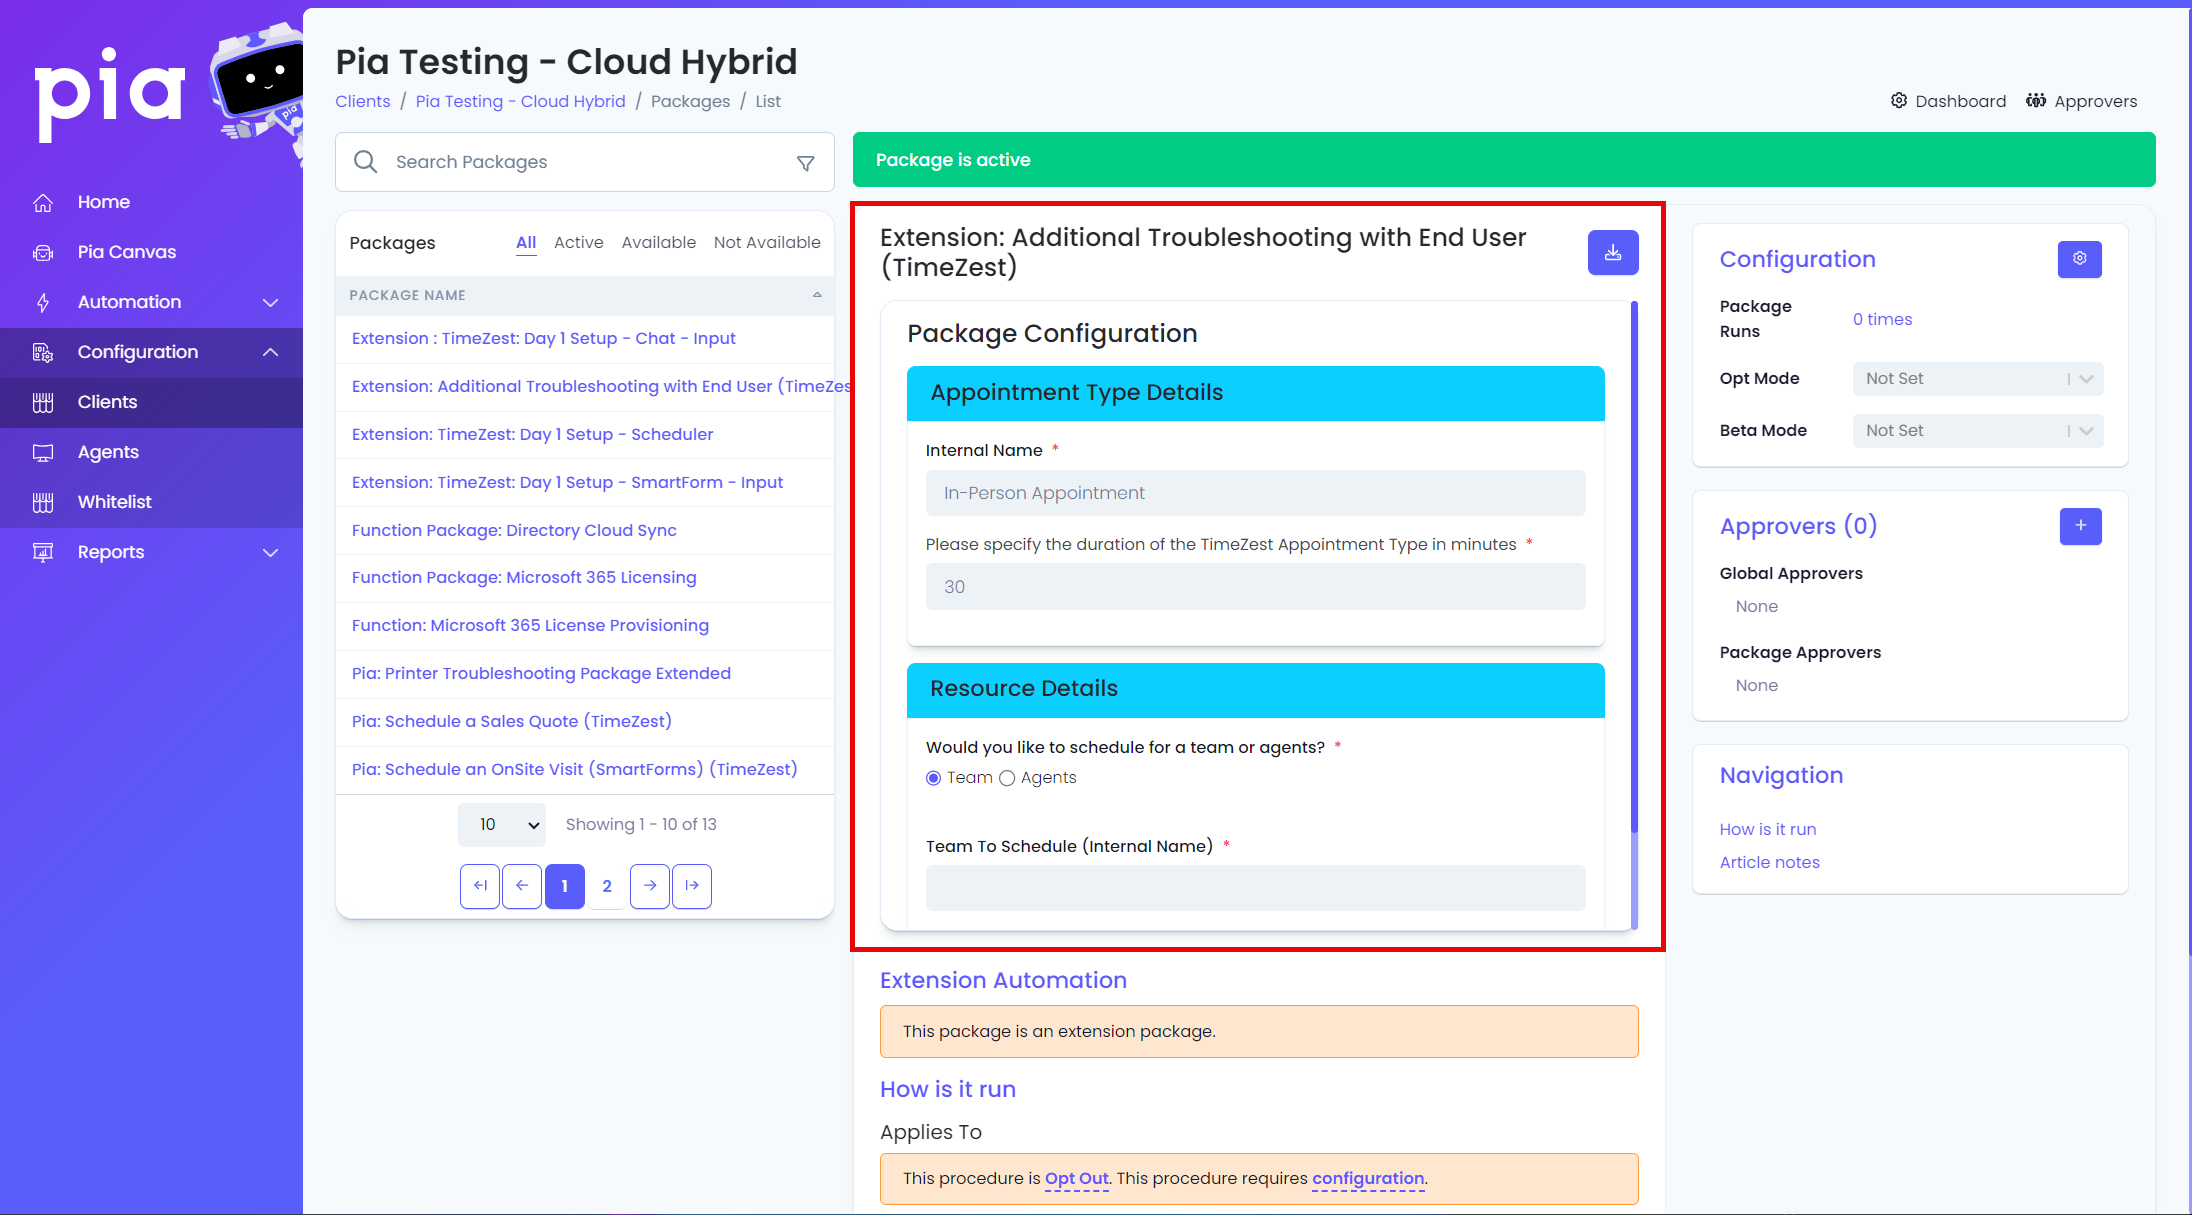
- Click 'configuration', complete the required (*) fields, and then Save.
- Repeat the process for all of the required packages.
Use the relevant information from your TimeZest account to complete the required (*) fields, and then Save. For further information see the TimeZest Help Center.
If you're having difficulties, we're here to help — reach out to Partner Support whenever you need assistance.
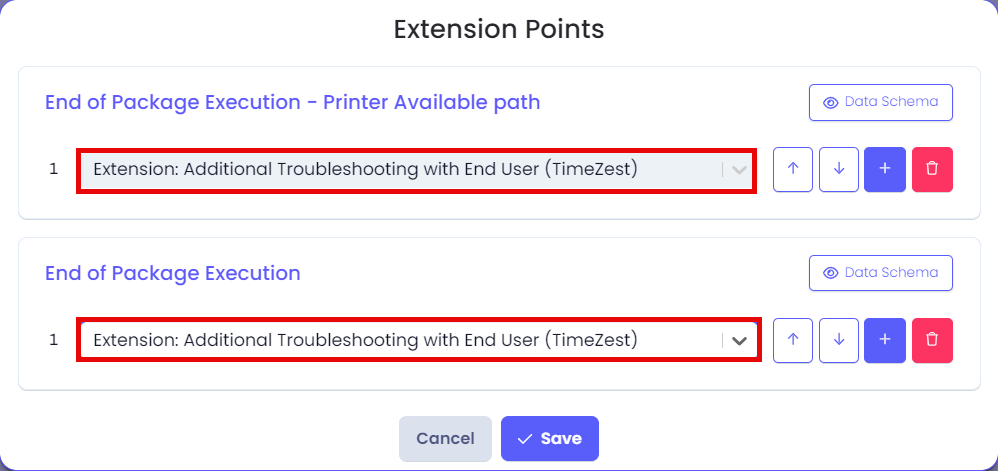
Configuring the Extension Points
When working with Staff Onboarding and the Printer Troubleshooting packages, you must configure Extension points. Refer to the below for the required configurations.
Navigate to the Pia Portal > Configuration > Clients > Select the appropriate package.
Click 'here' under Extension Automation.
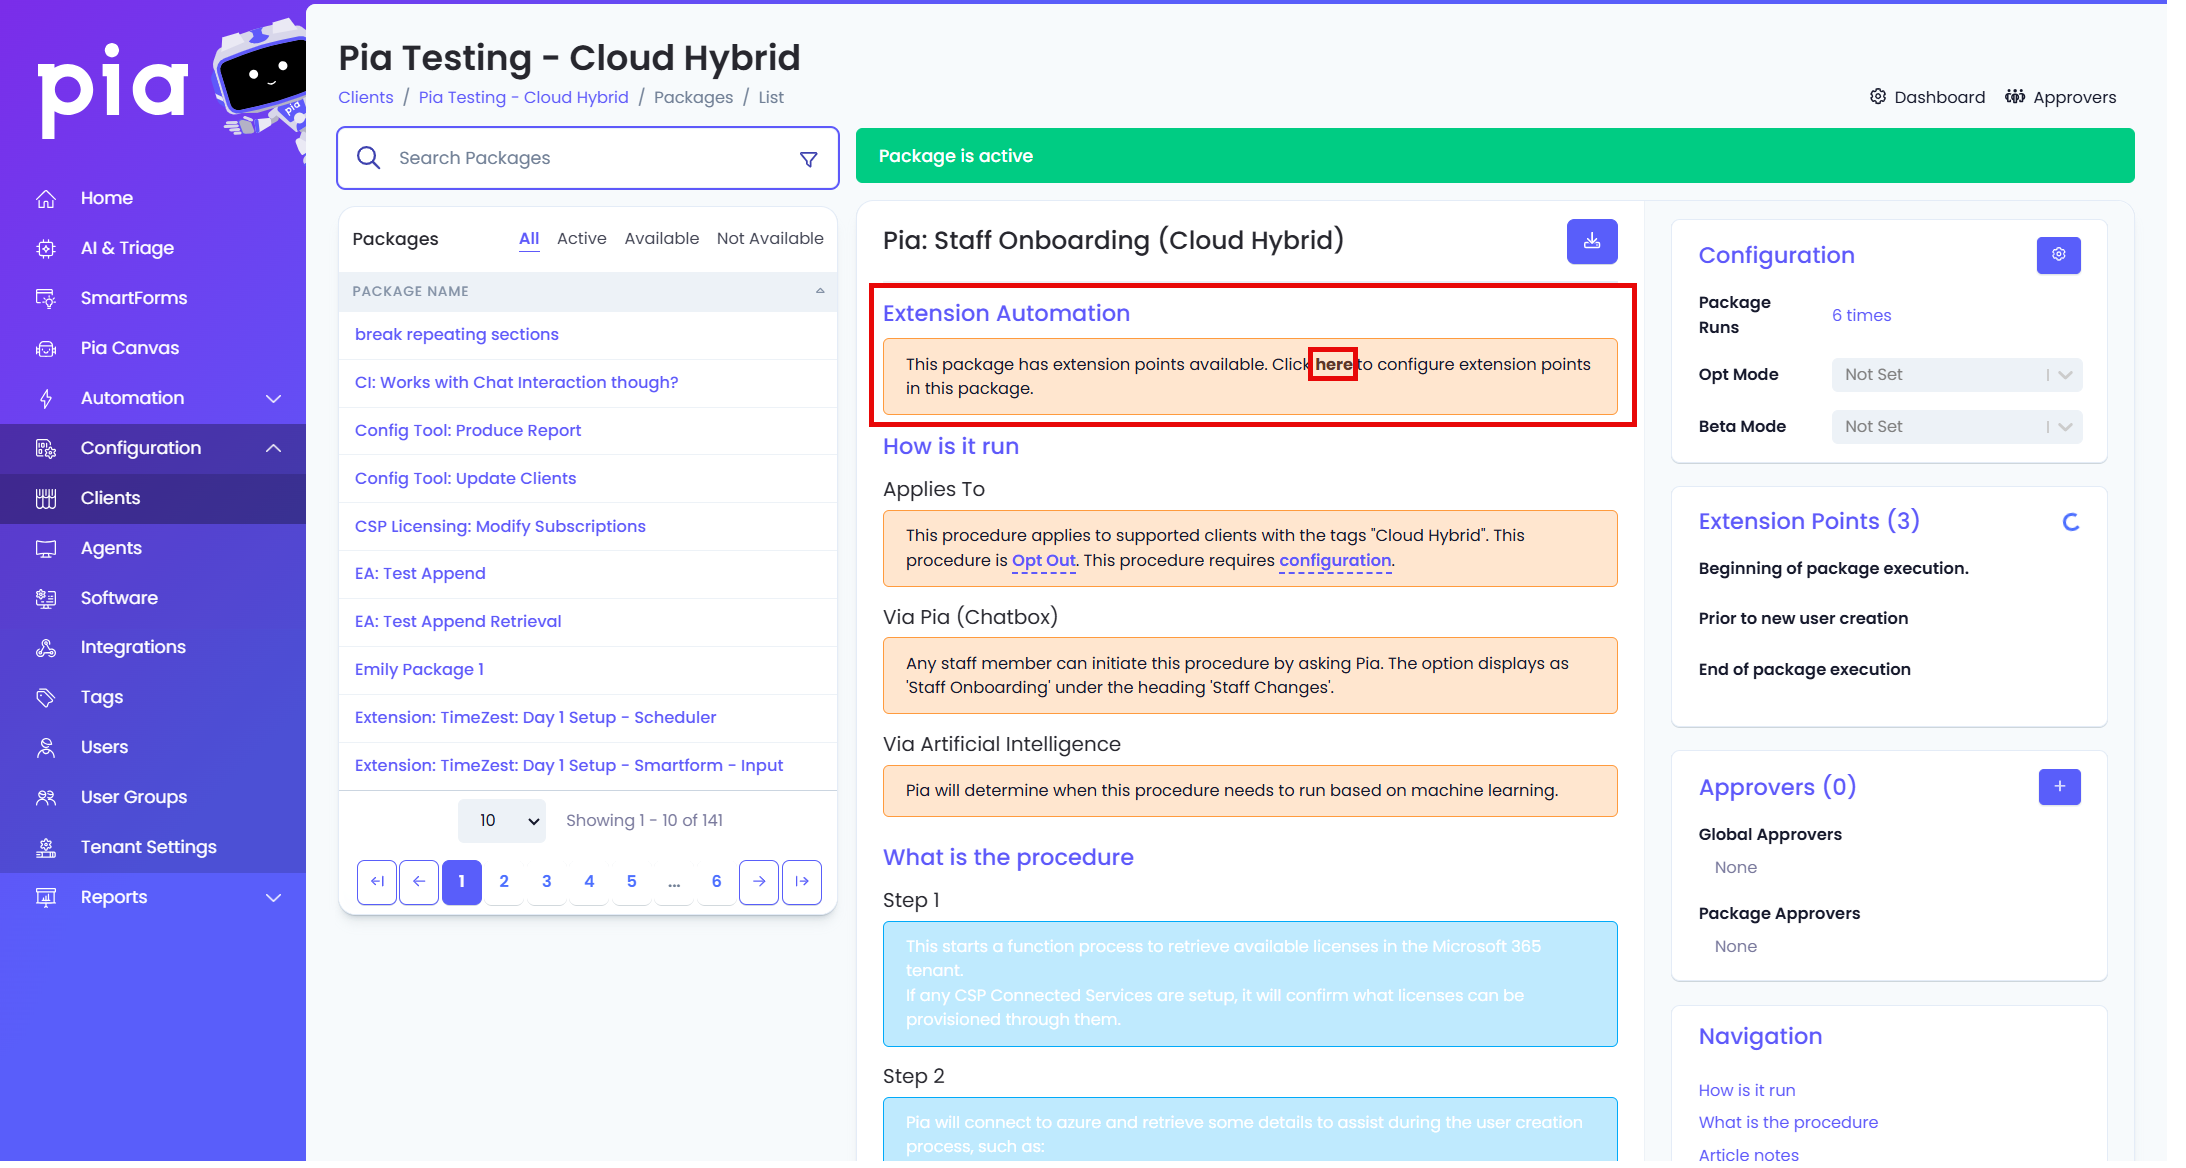
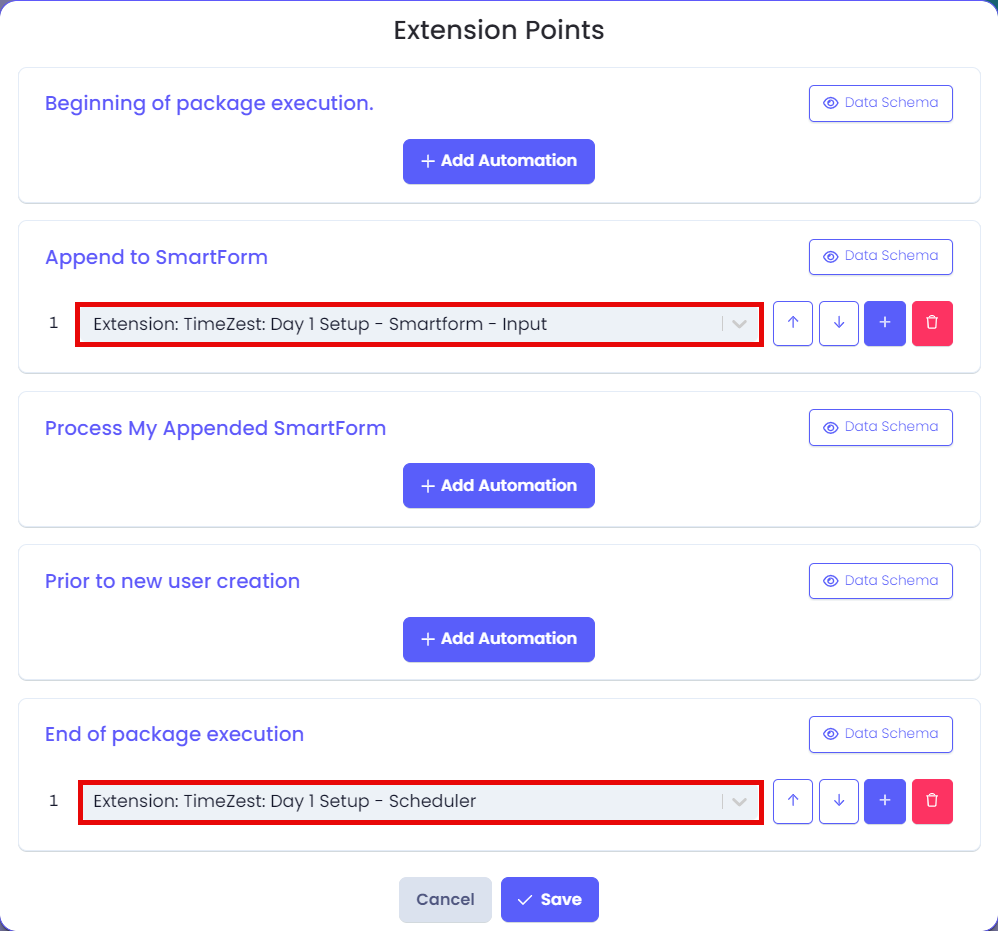
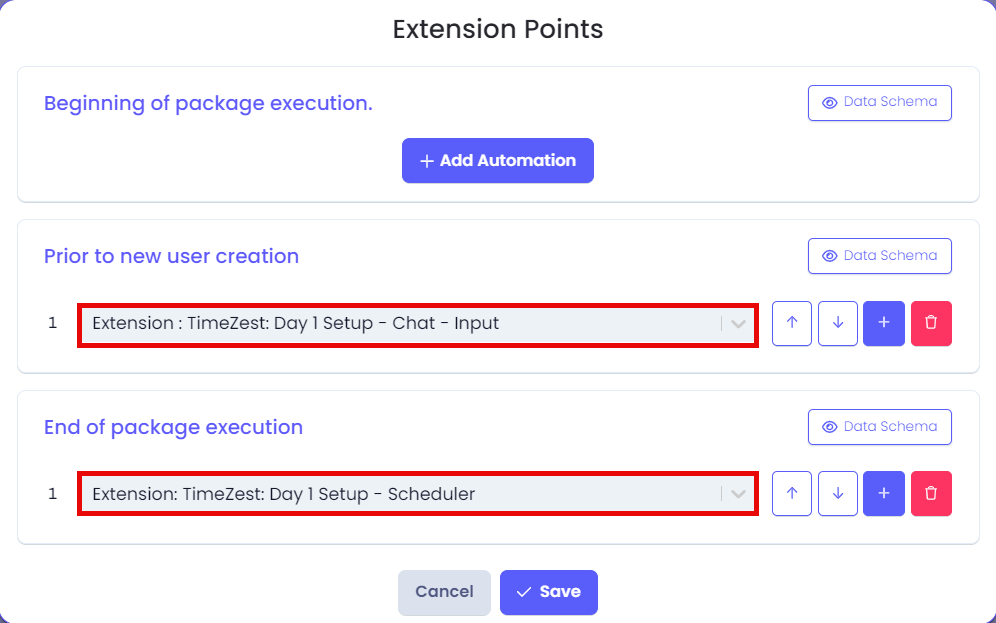
Refer to the corresponding screenshot below for the extension point/s you wish to configure:
Staff Onboarding (SmartForm)
Staff Onboarding (non SmartForms)
Printer Troubleshooting